
Turn off poor placements with a filter
Goal
Remove from the campaign the zonesA specific ad slot on a site or in an app, for example a block on a site page. that spend budget without clicks or conversions. To do this, you need a filterA whitelist or blacklist of values, such as zones or IP addresses. It limits where ads are shown.: a blacklist of zones attached to the campaign. The same way, you can keep only the best zones in the campaign with a whitelist.
Before you start
- A campaign to attach the filter to.
- A list of zone IDs. A zone ID looks like
1201:a7f3c9. The Coefficients section lists zones with campaign statistics. For details, see Raise or lower the bid on specific placements. The{zone_id}macro passes the zone ID into the campaign link. For details, see Macros.
Steps
Open the campaign, go to the Filters tab and click New filter. If the filter you need already exists, click Add from library and select it, then go straight to step 7.
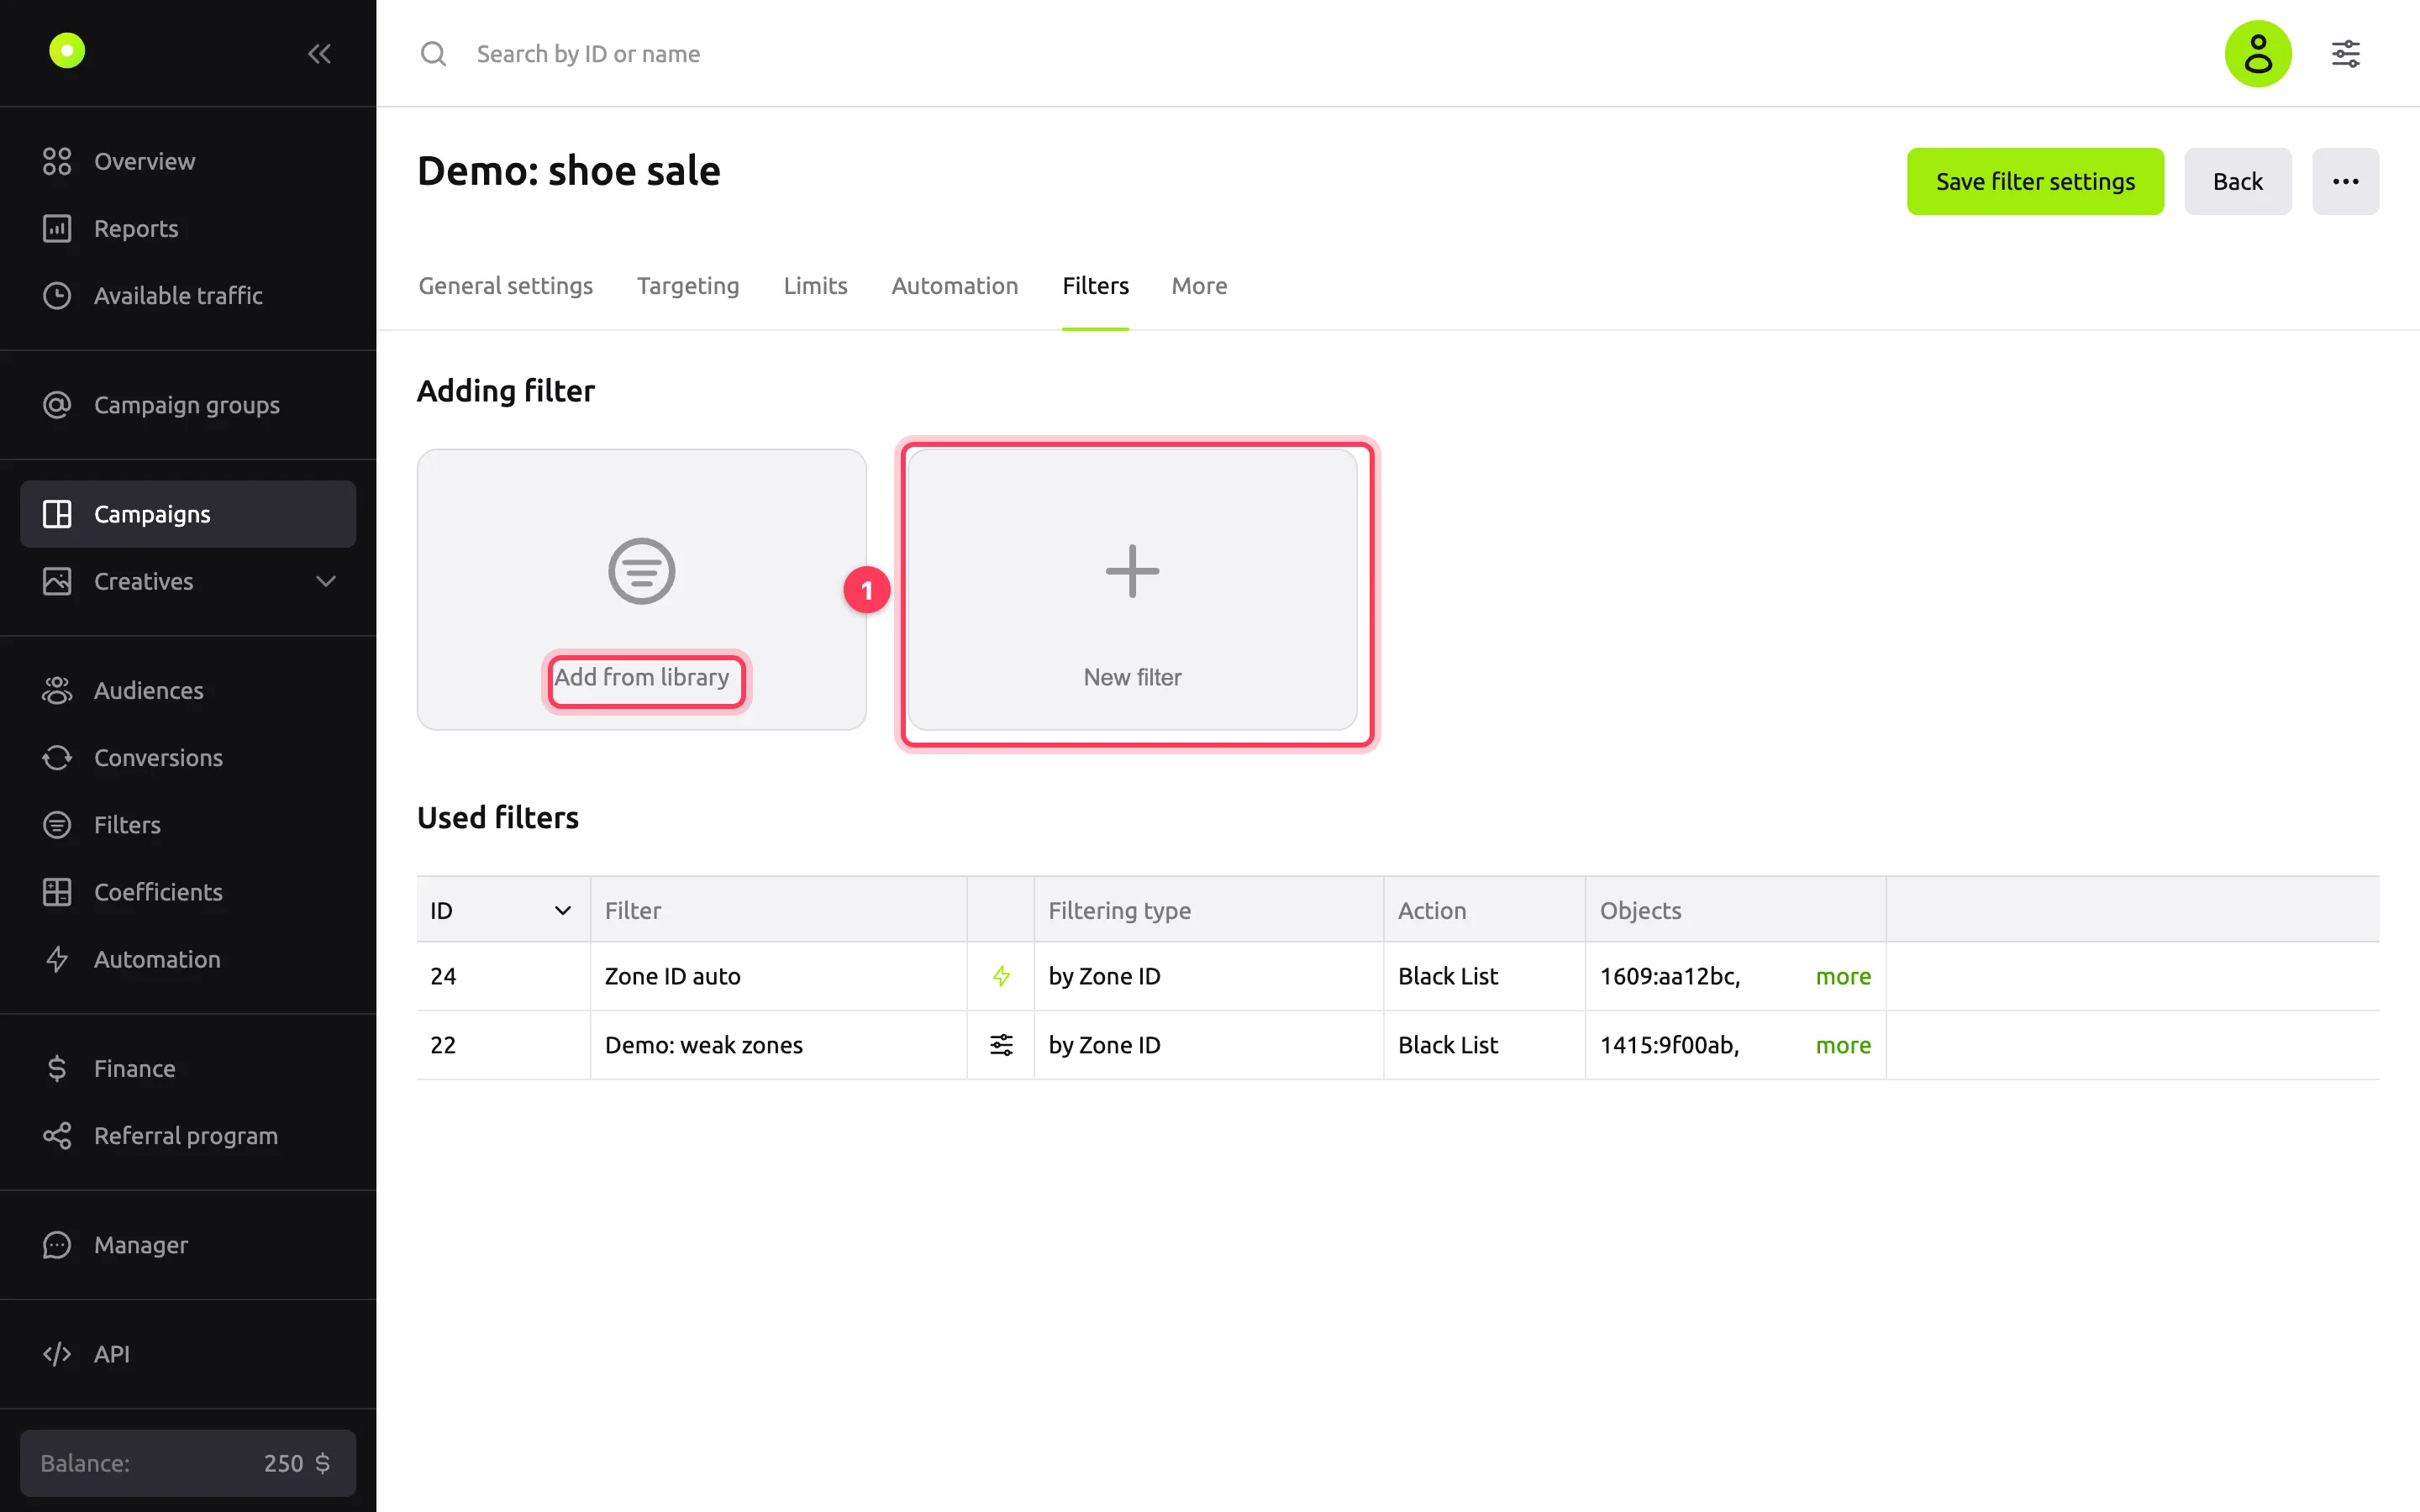
In the Filter name field, enter a name, up to 100 characters. You will use it to find the filter and attach it to other campaigns.
In the Filter type field, select Zone ID. The other option is IP-Address: user addresses, ranges and subnets. For the formats, see IP address formats.
In the Zone ID field, enter a zone ID and press Enter. You can paste several IDs at once, separated by commas. The dashboard removes duplicates. You cannot save an empty filter: add at least one value.
To the right of the field, select Disable (exclude): the filter becomes a blacklist. Enable (include) is selected by default: this is a whitelist, and the campaign buys only the listed zones.
Click Save.
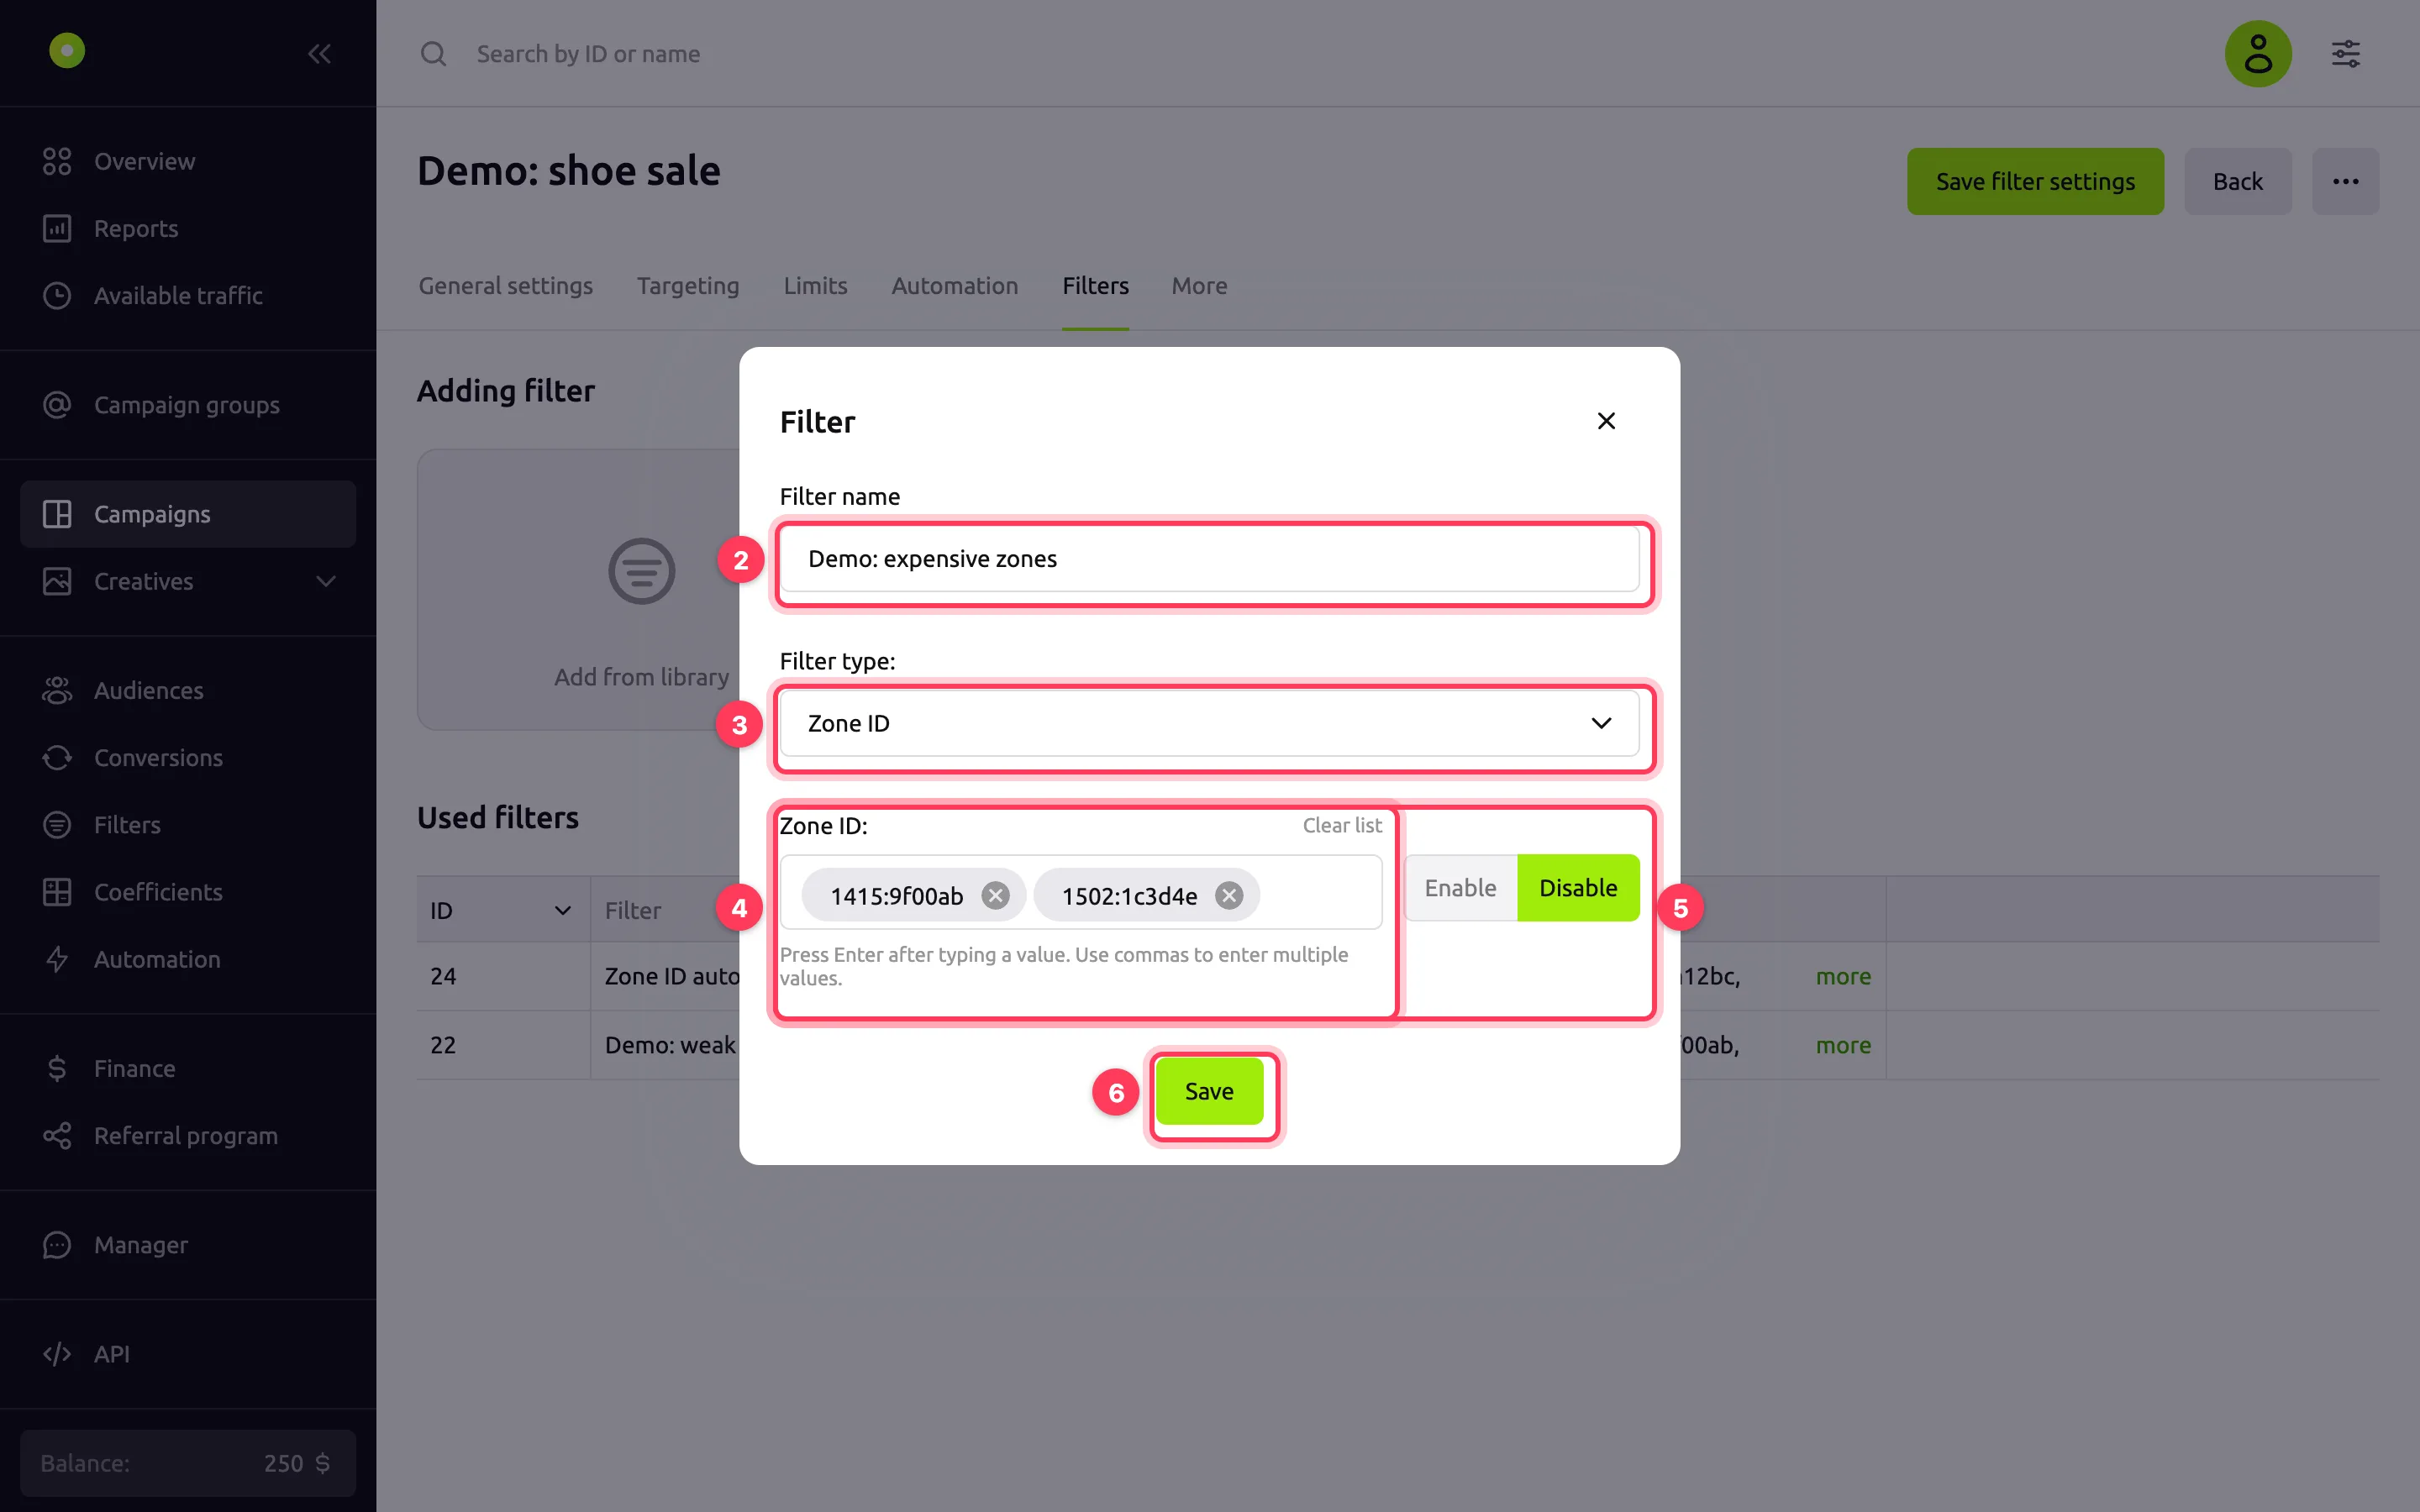
Click Save filter settings at the top of the page. Until you click this button, the filter is not attached to the campaign.
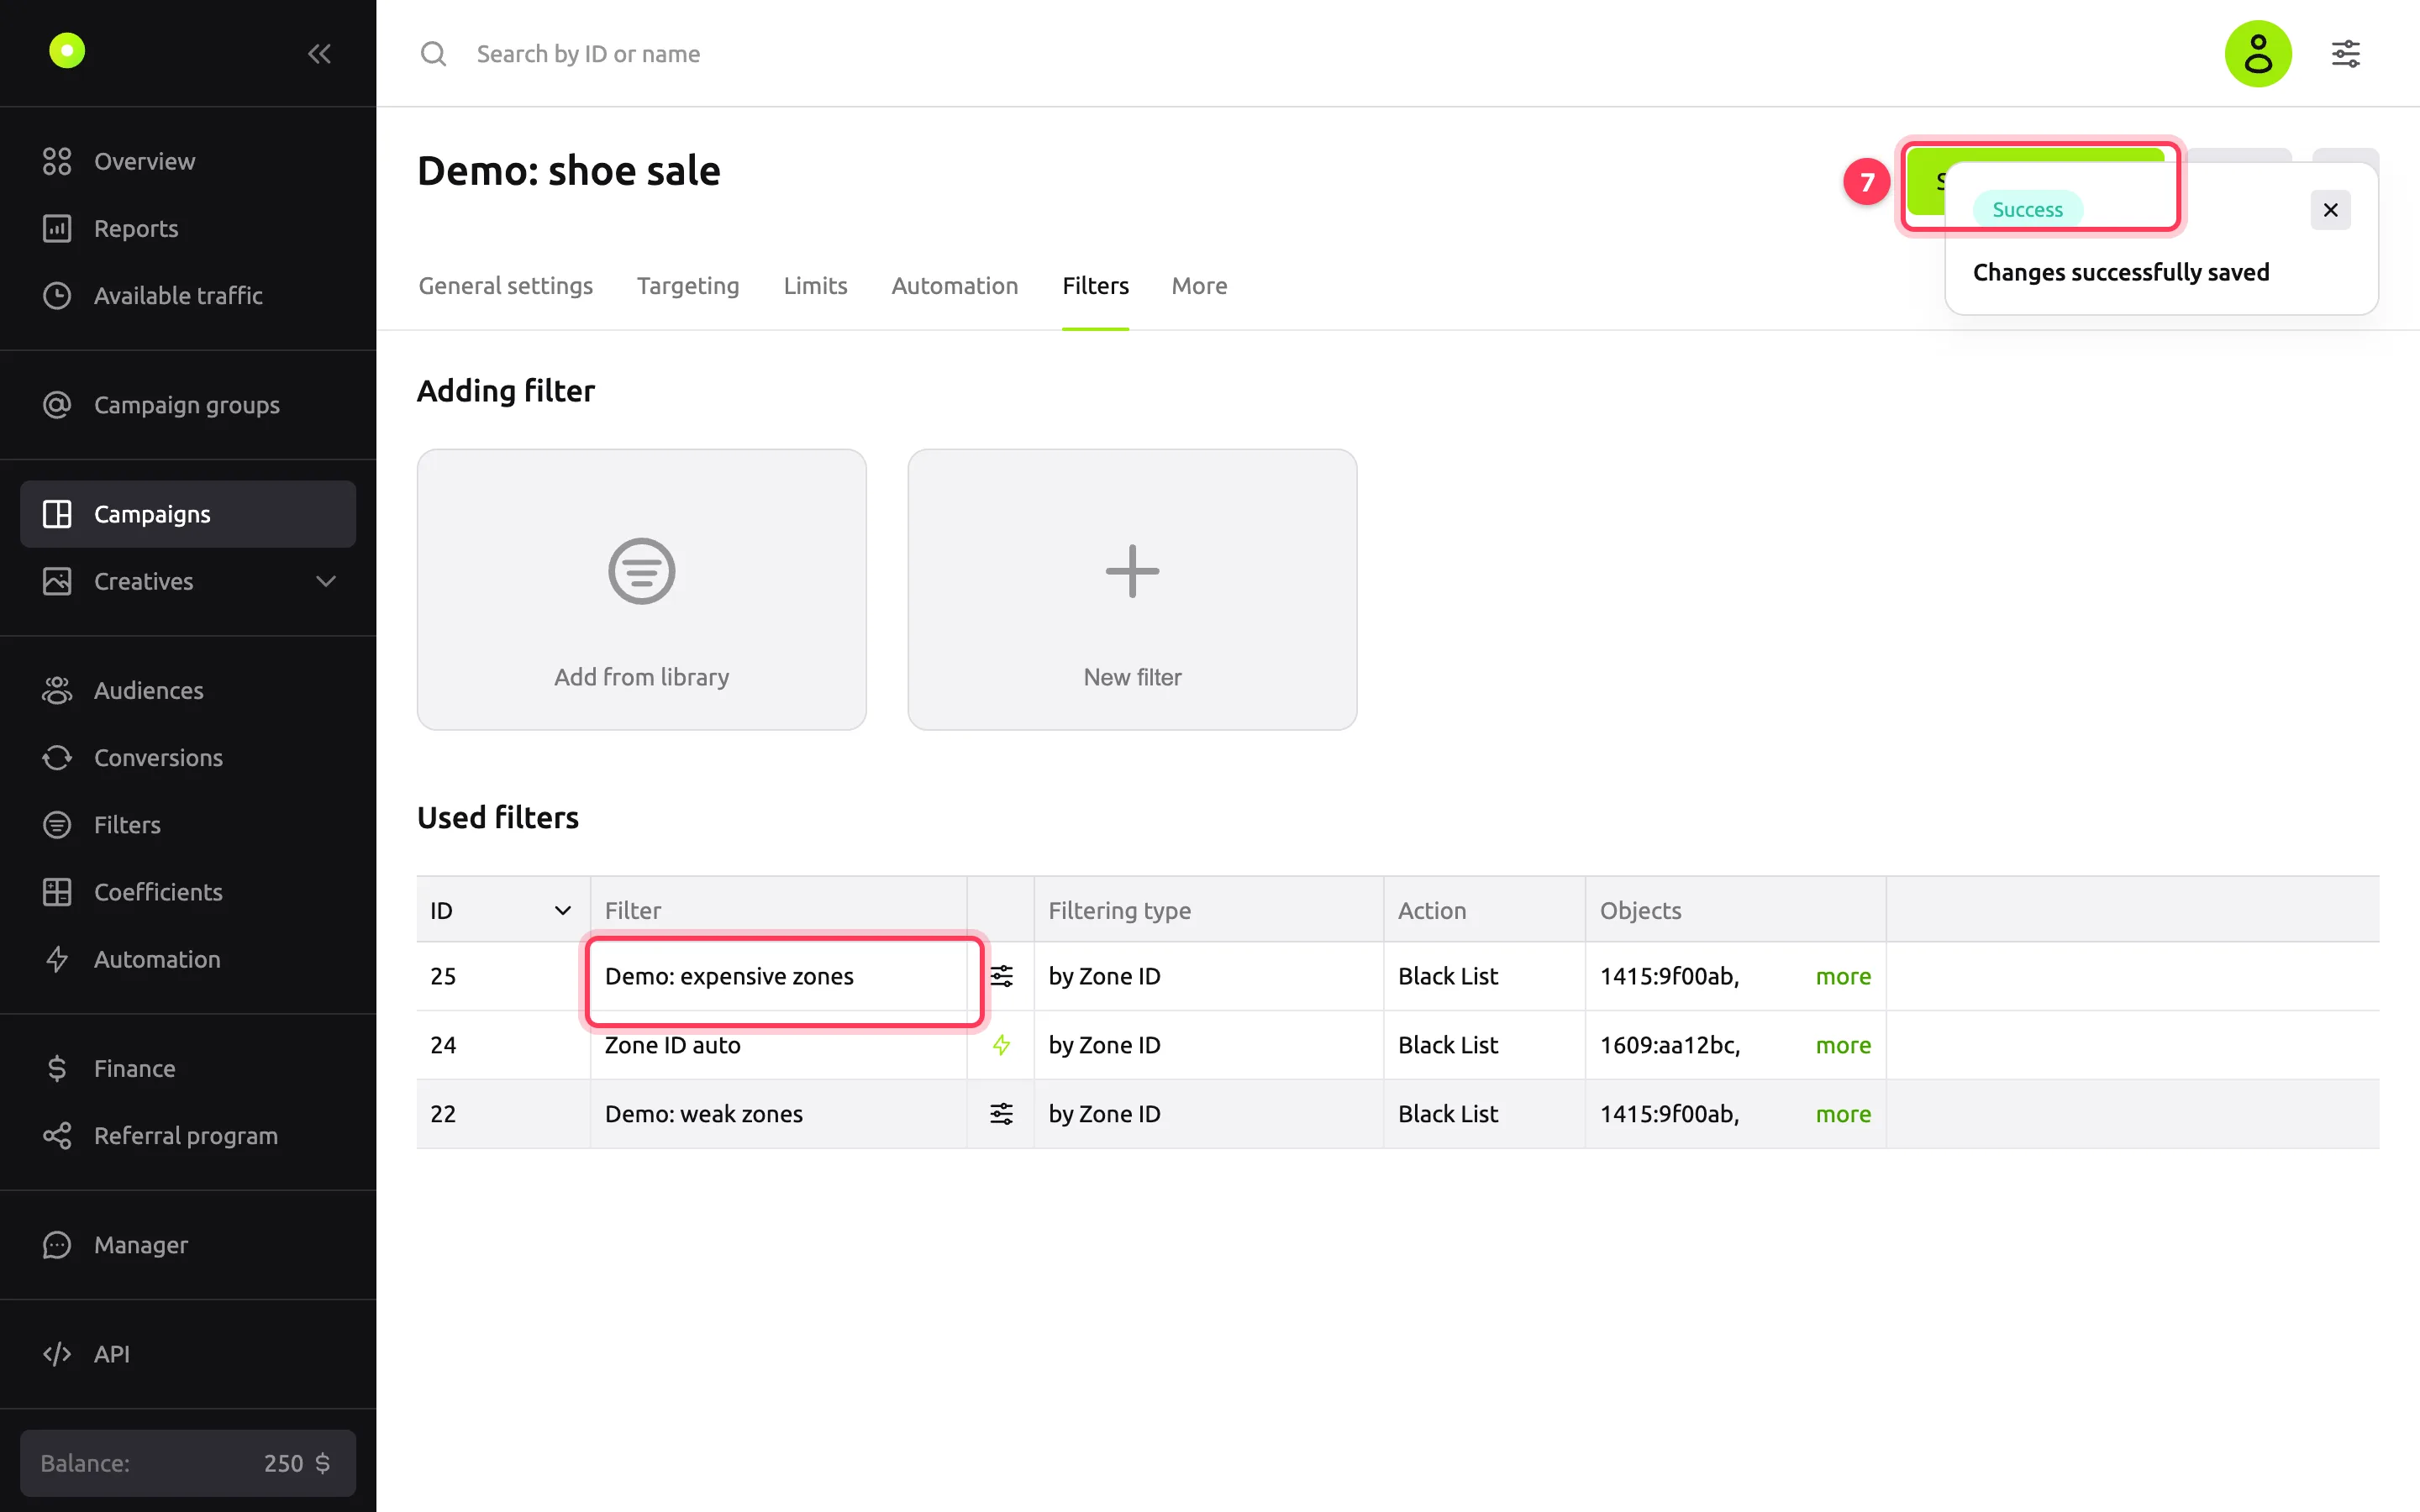
Result
The message "Filters successfully updated" appears. The filter appears in the Used filters table, and the Action column shows Black List. The campaign stops buying impressions in these zones.
The filter also appears in the Filters section of the left menu. From there you can edit it or attach it to another campaign: in the filter menu, select Using Filter. A change to the filter applies to all campaigns it is attached to. For details on the library, see the Filters reference.
How multiple filters combine
- Several blacklists of the same type are merged: the campaign buys none of their values.
- Several whitelists of the same type are merged too: the campaign buys any of their values.
- If a value is in both a whitelist and a blacklist, the blacklist wins: the campaign does not buy it.
- Filters of different types work together: for example, an impression must pass both the Zone ID filter and the IP address filter.
WARNING
A whitelist narrows traffic a lot: the campaign buys only the listed zones. If there are almost no impressions after you attach a whitelist, check that it has enough zones. For details, see No impressions.
Other filter types
The filter form has two types: Zone ID and IP-Address. The Filters tab and the library can also show filters of other types: by domains, app Bundle IDs, publishers, SUB IDs and keywords. They are created by automation rules or by your manager. For what each type selects and who creates it, see the Filters reference.
IP address formats
In an IP-Address filter, you can enter:
| Format | Example |
|---|---|
| IPv4 address | 192.0.2.1 |
| IPv4 range | 192.0.2.0-192.0.2.10 |
| IPv4 subnet (CIDR) | 192.0.2.0/24 |
| IPv4 subnet with a mask | 192.0.2.0/255.255.255.0 |
| IPv6 address | 2001:db8::1 |
| IPv6 range | 2001:db8::-2001:db8::10 |
| IPv6 subnet (CIDR) | 2001:db8::/64 |
Troubleshooting
| Symptom | Cause | Fix |
|---|---|---|
| The filter was created but is not in the campaign after you switch to another tab | Save filter settings was not clicked | Add the filter from the library and click Save filter settings. When you leave the page, the dashboard offers to save the changes: click Save |
| The campaign stopped getting impressions | A whitelist is attached: Enable is selected instead of Disable | In the filter menu, select Edit Filter and switch to Disable |
| "Check the IP address or range: …" | The value does not look like an IP address, range or subnet | Fix the value. Hover over the hint next to the field to see the allowed formats |
| The filter has a lightning icon instead of a menu | The filter was created by an automation rule. Rules create blacklists of zone IDs, domains and app Bundle IDs | You cannot edit or delete it. To stop it from growing, stop the rule. For details, see Set up automation rules |
| The campaign has a filter named "Selective coeffs of campaign …" | Zones are turned off in the Coefficients section | This is the blacklist of turned-off zones. Manage it in the Coefficients section |
To remove a filter from the campaign, select Unlink filter in its menu on the Filters tab and click Save filter settings. The filter itself stays in the Filters section. You can delete it completely only there, with Delete filter. Deletion cannot be undone.
Next steps
- Filters: filter types and statuses, the library and the Filter usage page.
- Raise or lower the bid on specific placements, if you do not want to turn a zone off completely.
- Set up automation rules so that weak zones get blacklisted automatically.