
Banners
A bannerA graphic ad of a set size. is an image or HTML5 creative shown in an ad slot of a specific size. One banner can serve in several formats, for example 300 × 250 and 600 × 500. You create a banner in Creatives → Banner with the New creative button and attach it to a banner campaign.
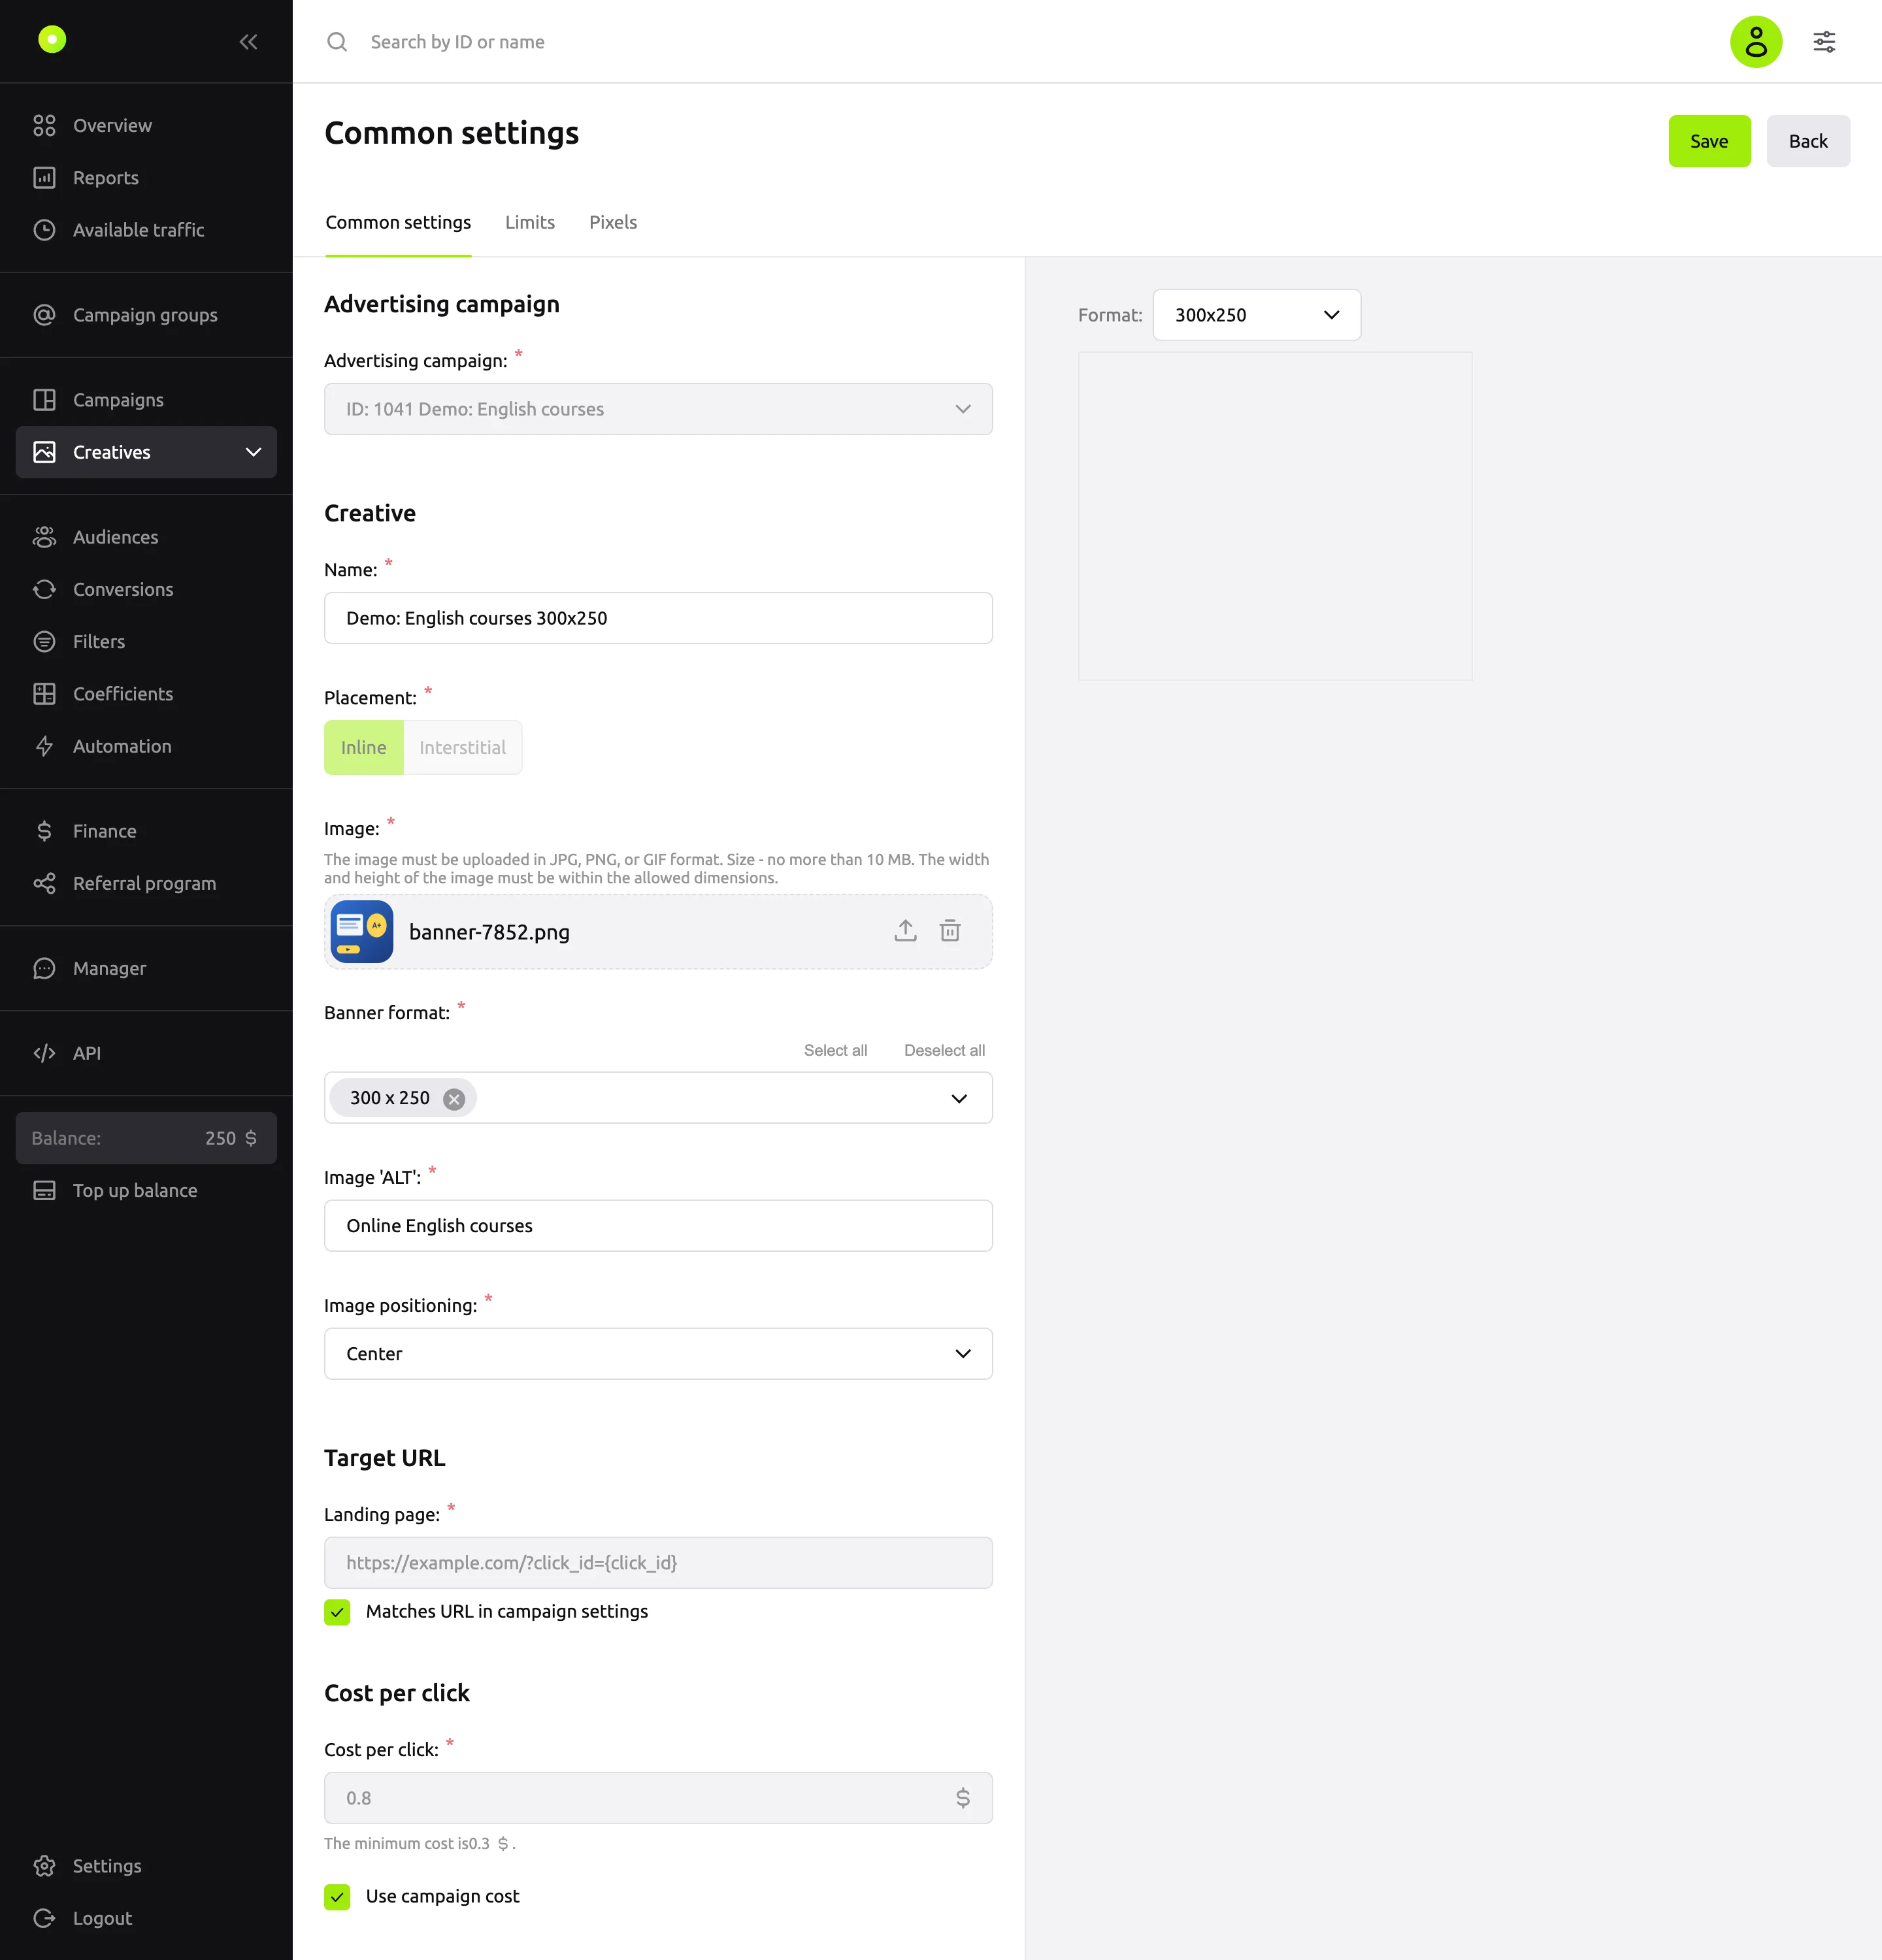
Fields
| Field | What it means | Values and limits |
|---|---|---|
| Advertising campaign: | The banner campaign the creative will run in | The list shows only banner campaigns. You cannot change the campaign after saving |
| Name: | The banner name in the creative list | Required, up to 255 characters |
| Placement: | Where to show the banner: Inline or Interstitial | Required. You cannot change it after saving. See details below |
| Banner type: | Image or HTML5 | Required. You choose it only during creation, before a file is uploaded |
| Image: | The banner file, for the Image type | JPG, PNG or GIF, up to 10 MB |
| Banner format: | The sizes of slots where the banner can be shown | Required, at least one format. Select all and Deselect all buttons |
| Image 'ALT': | Alternative text for the image, for the Image type | Required, up to 255 characters. A new banner has "Sponsored content" filled in |
| Image positioning: | Image alignment in the slot: Center, Top or Bottom | Required, for the Image type |
| Landing page: | The address that opens on click | Required, a full URL with http:// or https://. You can leave it empty if Matches URL in campaign settings is selected |
| Cost per click: | The price of this banner | Not lower than the minimum price. You can leave it empty if Use campaign cost is selected. See details below |
Placement
- Inline: a regular ad slot on a page or in an app. Such a banner can also get into a full-screen slot.
- Interstitial: a full-screen slot. A banner with this placement is shown only there.
Image type
- Drag a file into the Image field or click the select on the device link in it.
- In the Banner format: field, select the sizes to show the banner in.
The list shows all formats, regardless of the image. The dashboard checks whether the selected ones fit when you save. If you upload another file, the selected formats are reset.
A format fits the image if:
- the aspect ratios match within 5%;
- the image is not smaller than the format: the dashboard does not stretch it;
- the image is no more than 3 times larger than the format on each side.
| Image | Fits | Does not fit |
|---|---|---|
| 600 × 500 | 300 × 250 | 728 × 90, 320 × 50 |
| 1456 × 180 | 728 × 90 | 300 × 250 |
| 300 × 250 | 300 × 250 | 600 × 500 (the image is smaller than the format) |
To show a banner in formats with different aspect ratios, create a separate banner for each image.
HTML5 type
The HTML5 type is in the list if HTML5 banners are enabled for your account. If it is not there and you need it, contact your manager.
You add an HTML5 creative in one of two ways, using the tabs:
- HTML5 creative archive: a ZIP archive up to 10 MB.
index.htmlmust be in the root of the archive. Each HTML and JS file inside can be up to 20 MB. - HTML5 creative code: paste the markup into the HTML5 creative code: field. The dashboard checks that it is HTML.
When you switch tabs, the uploaded archive, the code and the selected formats are reset.
Then select HTML creative size::
- Adaptive: the creative adjusts to its container. Your styles must support a fluid layout.
- Fixed: select a size in the list. It makes the banner display correctly and does not narrow targeting by format.
Then select the formats in the Banner format: field.
Preview
To the right of the form is the Creative preview. It appears after saving: "Preview is available after creating the creative". The Format: list above the preview switches between the selected formats.
To open the preview in a separate tab, go to the banner list: row menu → Creative preview.
Landing page
If you select Matches URL in campaign settings, the banner takes its link from the campaign's Target URL field, and the Landing page: field is locked. The checkbox is unavailable if the campaign has no target URL: "Campaign not selected or Target URL not specified."
When the campaign target URL changes, banners with this checkbox get the new link. If you clear the target URL in the campaign, these banners stop, and their checkbox is cleared.
Under the field is the Available macros list: clicking a macro inserts it into the link. For macro values, see the Macros reference.
To replace part of the link in several banners at once, use the banner list. See Change the price and URL and copy creatives in bulk.
Price
The price block is called Cost per click with any payment model. Banner campaigns are paid per impression, so in practice it is:
- in a CPMThe price per thousand impressions. campaign: the price per 1,000 impressions of this banner;
- in a SMART CPMPayment per 1000 impressions in which the platform picks the bid up to a set maximum. campaign: the maximum price per 1,000 impressions.
The minimum price is shown under the field: "The minimum cost is …".
If you select Use campaign cost, the field is locked and the banner uses the campaign price. Without the checkbox, the banner has its own price.
The dashboard warns you, but still lets you save, if you enter more than $1 (RUB 10, €1) when creating a banner or raise the price more than twofold when editing it. For more about prices, see Payment models.
You can also change the price in the banner list: right in a Price column cell, or for several banners at once. See Change the price and URL and copy creatives in bulk.
Saving and moderation
A new banner has two buttons: Save opens the saved banner, Save and add another opens an empty form with the same campaign.
A new banner goes to the Moderation tab. Once approved, it becomes active if Automatically start ads after moderation is selected in the campaign; otherwise it is stopped.
An edit in the form sends the banner back to moderation if you changed:
- the name;
- the image, HTML5 archive or code;
- the formats, ALT or image positioning;
- the part of the link after the domain: protocol, path, parameters or anchor;
- the Matches URL in campaign settings checkbox.
Changing the price, the Use campaign cost checkbox or only the domain in the link does not send the banner to moderation.
For what each status means, see Campaign and creative statuses. For how the review works and what is not allowed in a creative, see Creative moderation and Creative and landing page requirements.
NOTE
You could previously create a banner of the Video type. Such banners open for editing with the Video file and VAST tabs, but you cannot create a new video banner. Video has its own format: video creatives.
You cannot select the AMP type in the form: an AMP banner can be created only through the API, if HTML5 banners are enabled for your account. Such a banner opens for editing with the AMP creative code: field, and the Type column of the banner list shows AMP for it.
The Limits tab
A saved banner has a Limits tab. It has three groups: Budget, Clicks and Impressions. Each group is turned on with a switch and contains a total, daily and hourly limit: Total:, Per day:, Per hour:. You do not have to fill in all three.
- Budget: an amount greater than 0. Clicks and impressions: a whole number from 1.
- If you turn off a group's switch, its values are cleared.
- To save the changes, click Save limit settings.
When a limit is used up, the banner stops serving, and its status does not change. A banner that used up its daily or hourly limit serves again the next day or hour. Days and hours are counted in UTC: a new day starts at 00:00 UTC. To see how much is used up, go to the banner list and hover over the speedometer icon in the banner's row. Campaign limits are described in Limit budget and impression frequency.
The Pixels tab
On the Pixels tab of a saved banner, you connect third-party pixels: the pixel link fires when the selected action happens.
- Click Add pixel link.
- In the Pixel link: field, paste the link from your system.
- In the Action type: field, select when the pixel fires: Impressions, Viewable impression (MRC 50%), Viewable impression (MRC 100%) or Banner click.
- Click Save pixel settings.
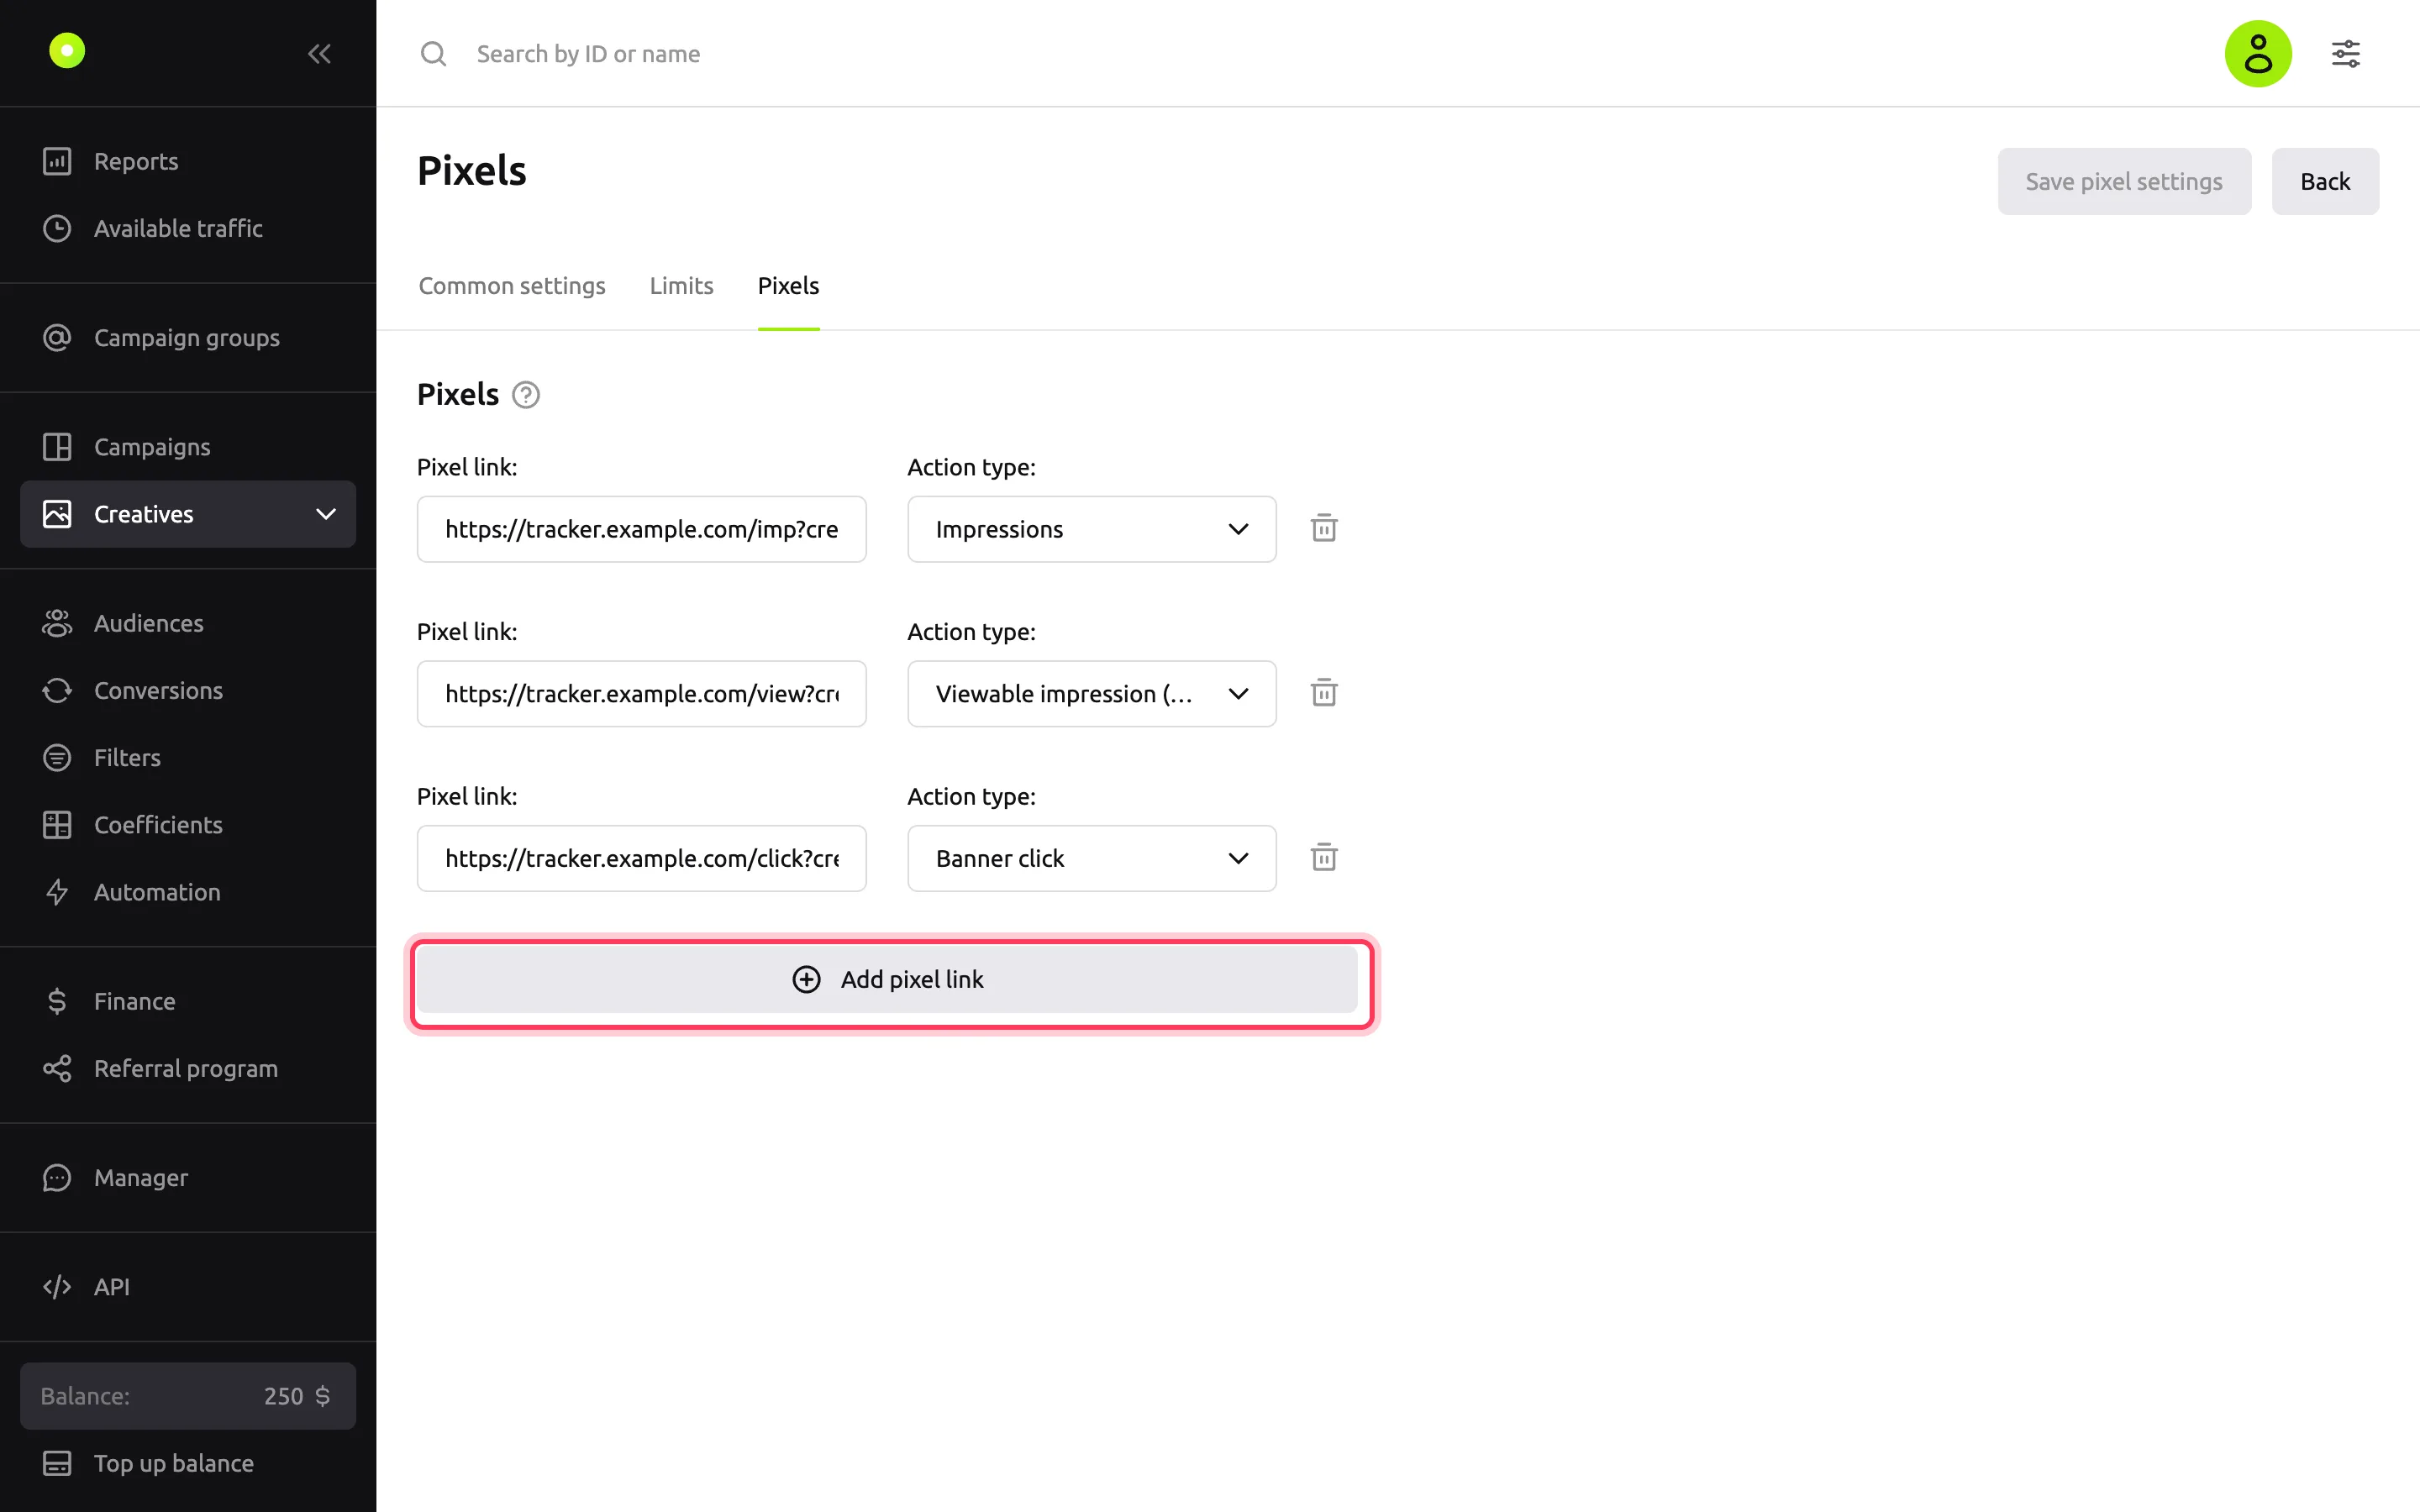
Each action type can have no more than 3 pixels. Editing pixels does not send the banner to moderation.
Errors
| Message | What to do |
|---|---|
| "Banner dimensions […] do not match the media file" | The brackets list the IDs of the formats that do not fit the image. Deselect them or upload an image that fits them. The rules are in the "Image type" section |
| "There are no available formats. Please check the width and height parameters of the uploaded image." under the Banner format: field | The dashboard did not receive the list of formats. Reload the page. If the message remains, contact your manager |
| "Specify the Target URL or select the checkbox below the field." | Enter a link or select Matches URL in campaign settings |
| "Invalid file type" | Upload a JPG, PNG or GIF; for HTML5, a ZIP archive |
| "File size exceeds the maximum allowable" | Reduce the file to 10 MB |
| "The archive must contain an index.html file" | Put index.html in the root of the archive |
| "File is not an archive" | Upload a ZIP archive |
| "Html is not valid" | Check the code on the HTML5 creative code tab |
| "Number of events … exceeds the limit: 3." on the Pixels tab | An action type has more than 3 pixels. Delete the extra ones |
Related pages
- Macros: what goes into the link.
- Change the price and URL and copy creatives in bulk.
- Campaign and creative statuses.
- Payment models.
- Video creatives.